

1.1 Training/Testing Set Validation Over a Single Run
- Double click on ExP.bat
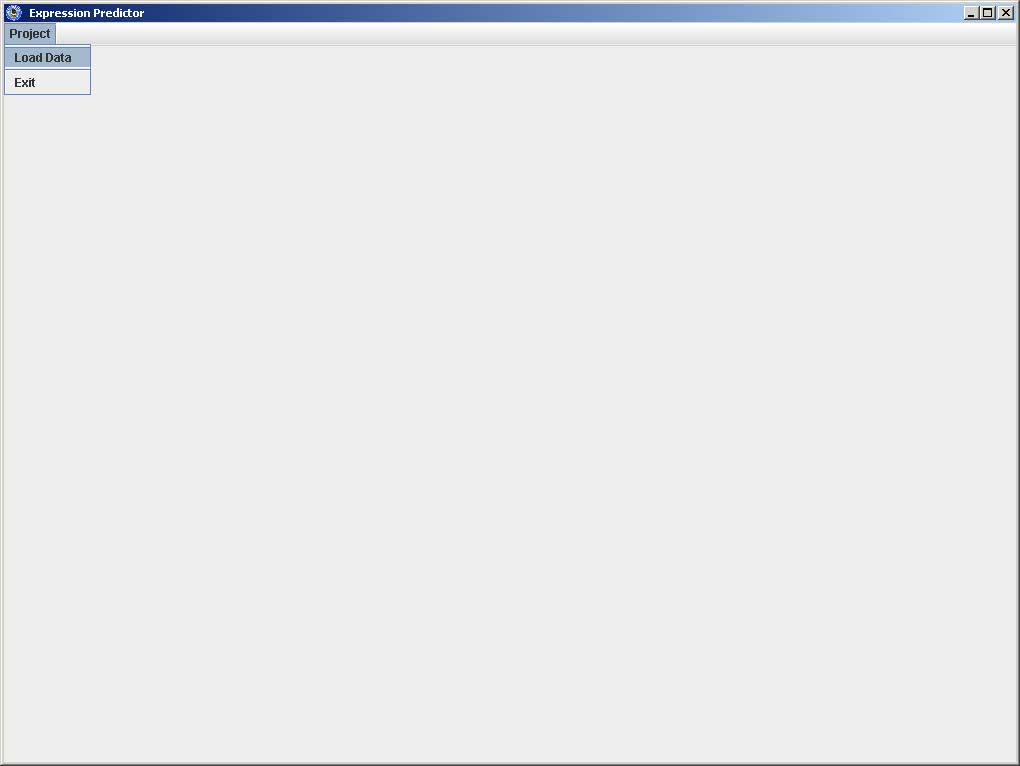
Click on Project and select Load Data
Select Input file
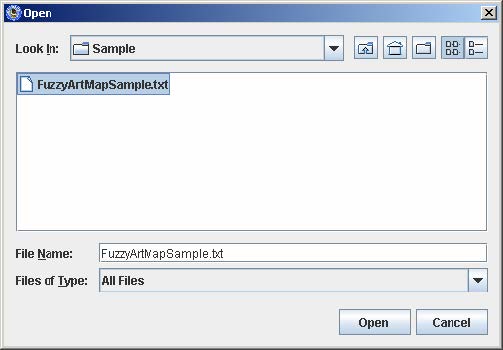
Click Open
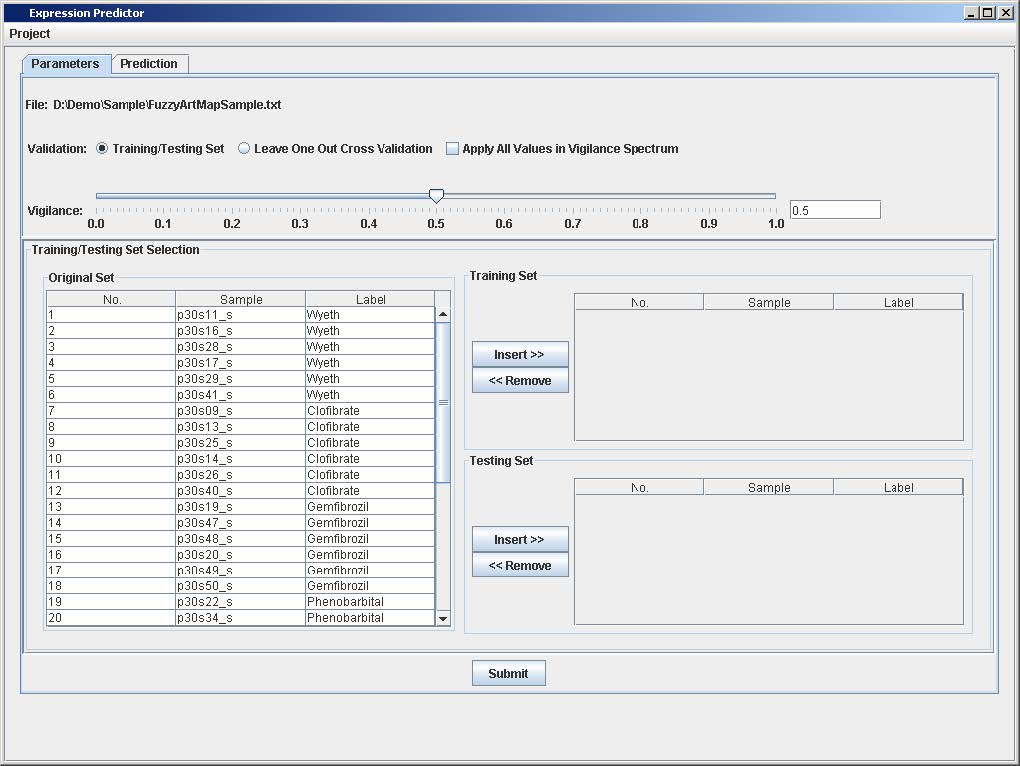
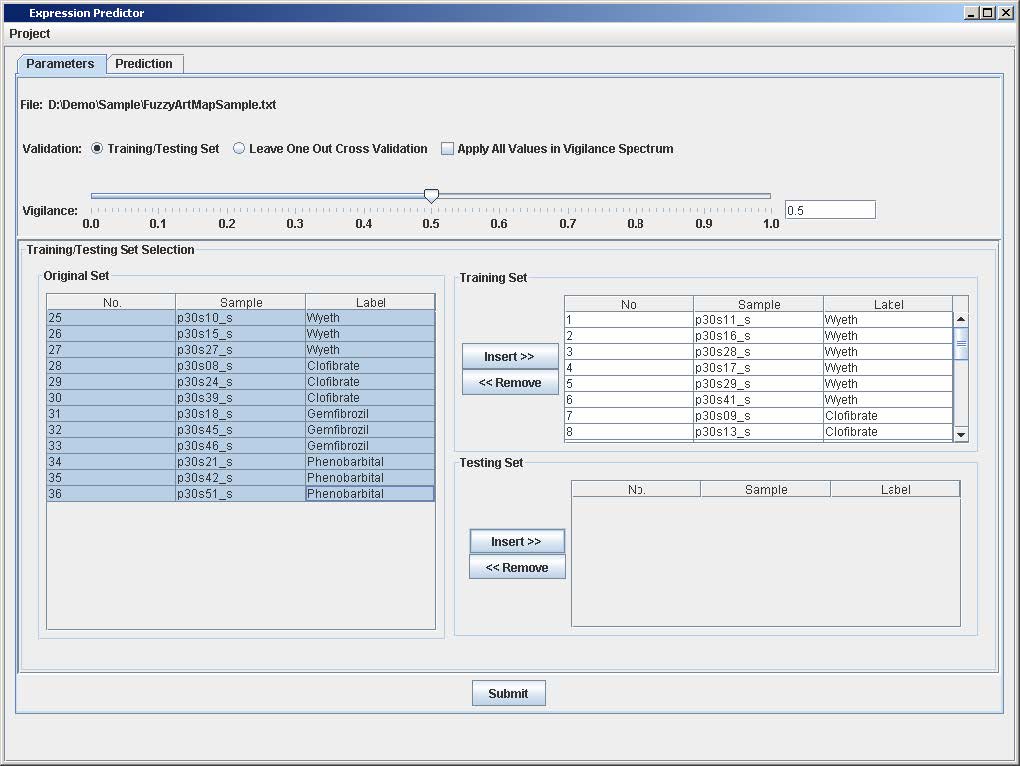
Select the Training Set
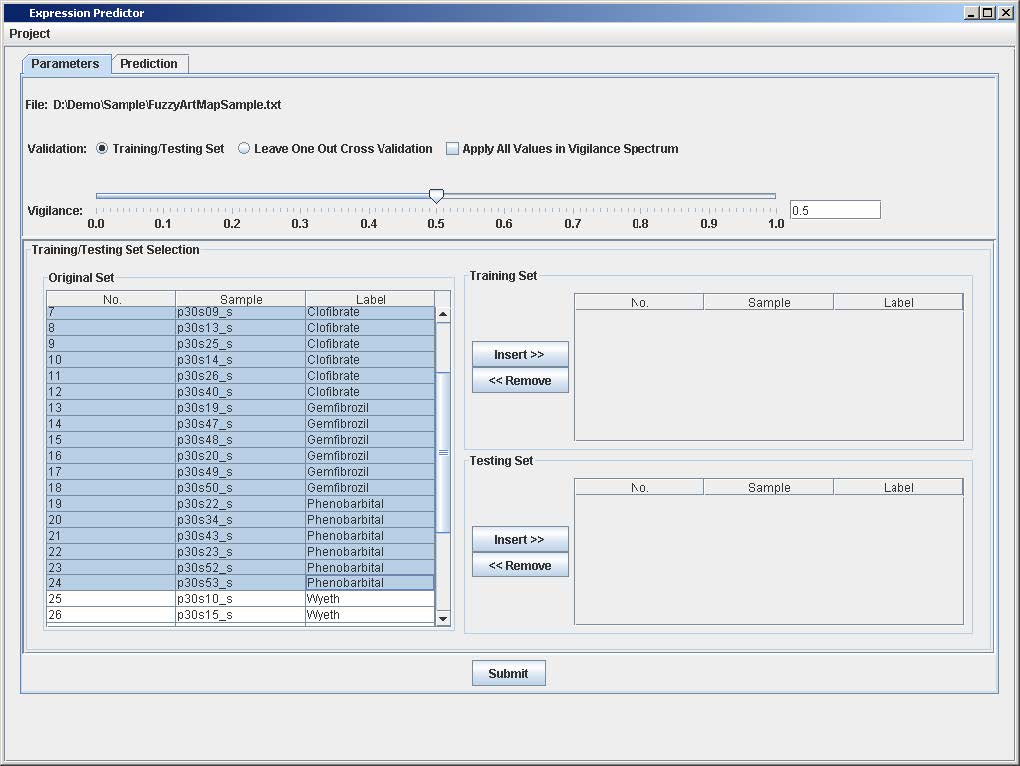
Click on the "Insert>>" button on the Training Set Panel
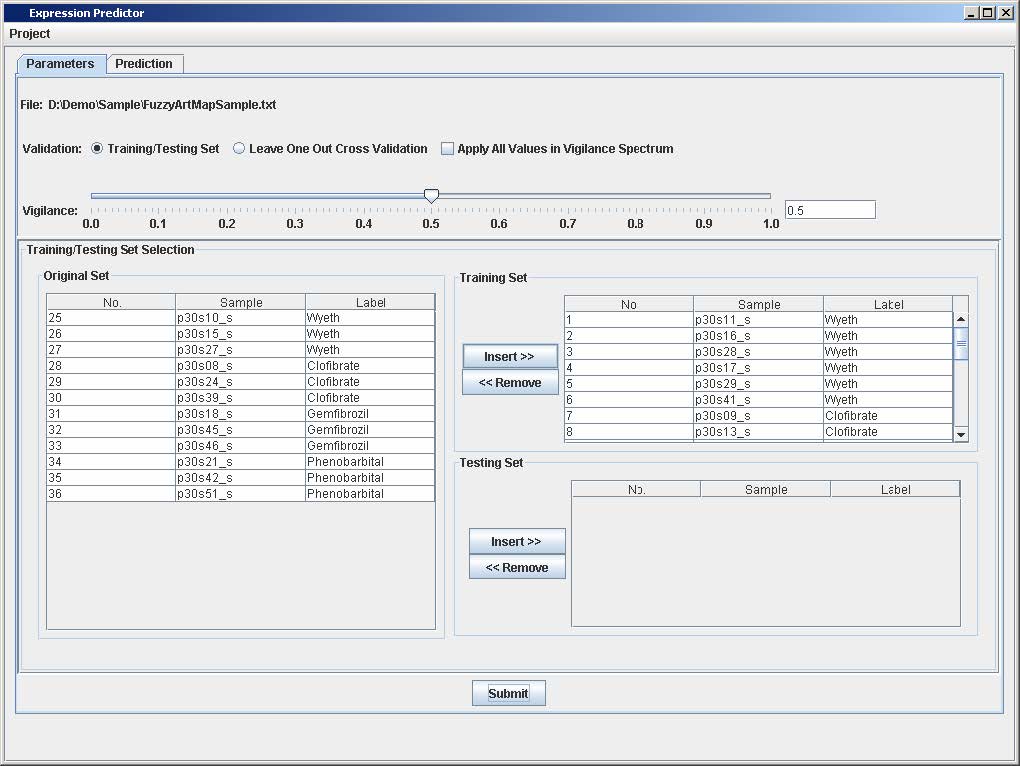
Select the Testing Set
Click on the "Insert>>" button on the Testing Set Panel
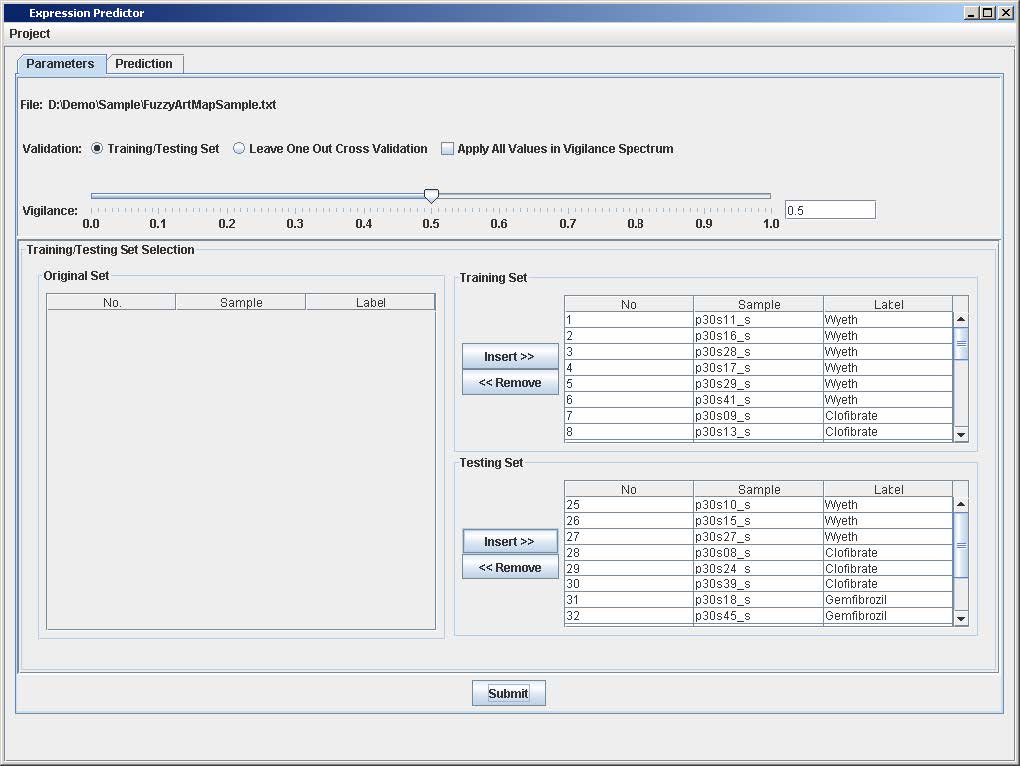
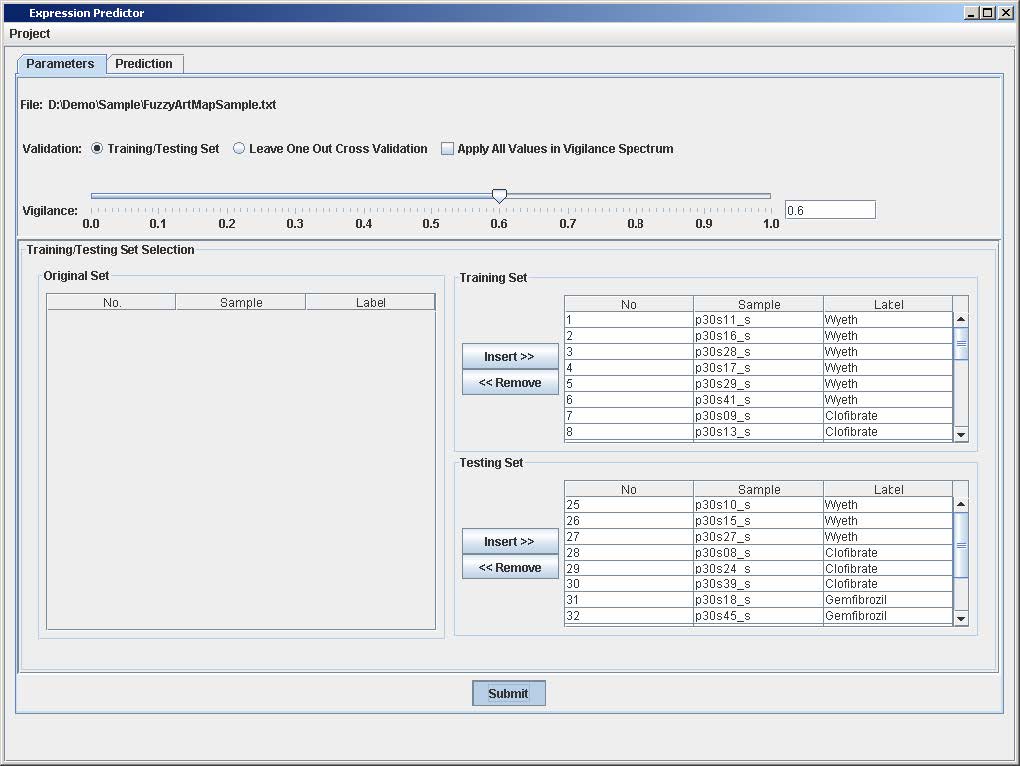
Select a vigilance value from the slider

Click on the "Submit button
Click on the Prediction Tab to view the confusion matrix

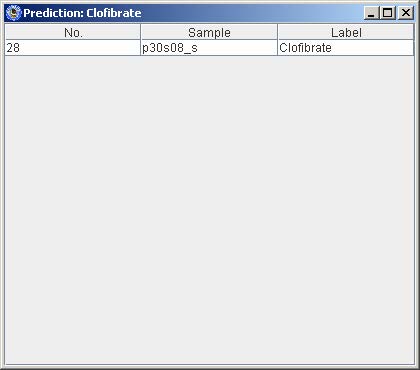
Click on one of the numbers in the confusion matrix to view the list of samples that corresponds the prediction in the selected cell from the matrix
1.2 Training/Testing Set Validation over the Entire Vigilance Spectrum
- Repeat steps 1 to 8 from Section 1.1
Click on the checkbox that says "Apply All Values in Vigilance Spectrum"

- Repeat steps 10 from Section 1.1
Click on Prediction Tab to view the prediction results using vigilance values from 0 to 1 with 0.01 increment at each cycle
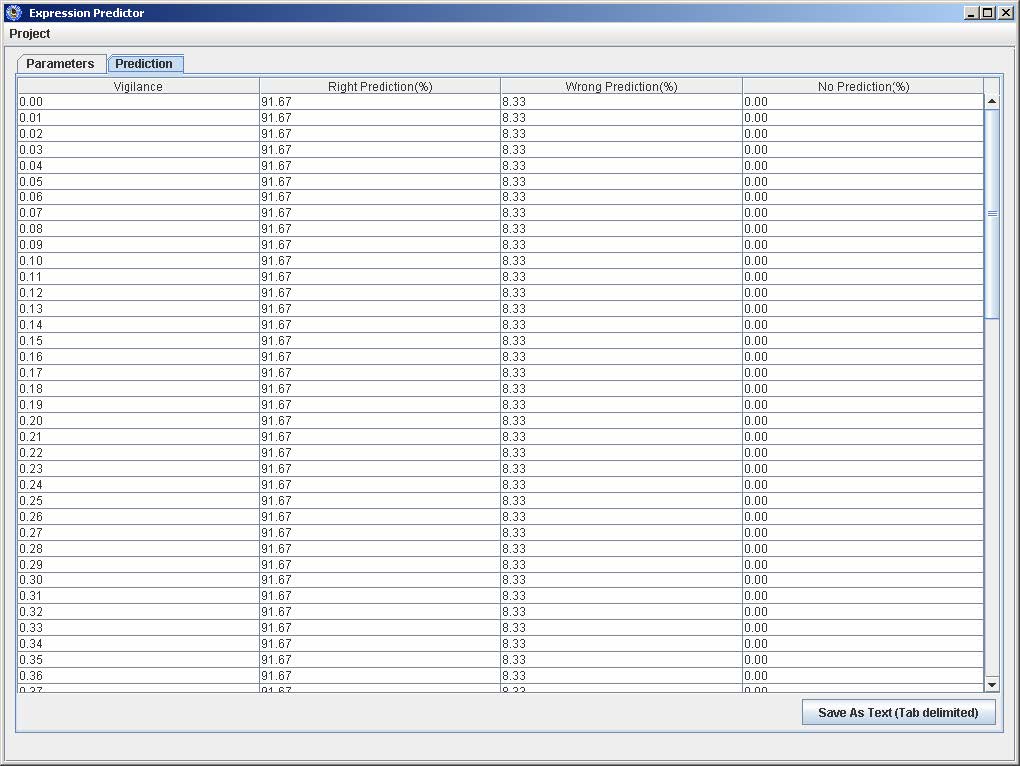
Click on "Save As Text (Tab delimited)," enter the filename, and click Save

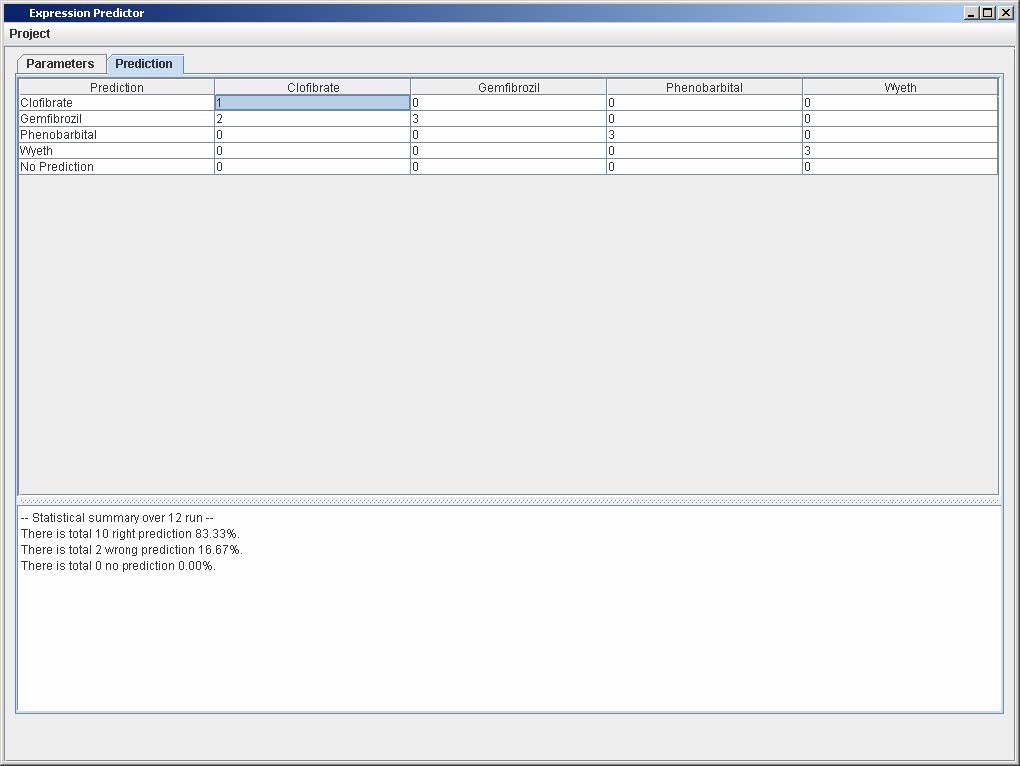
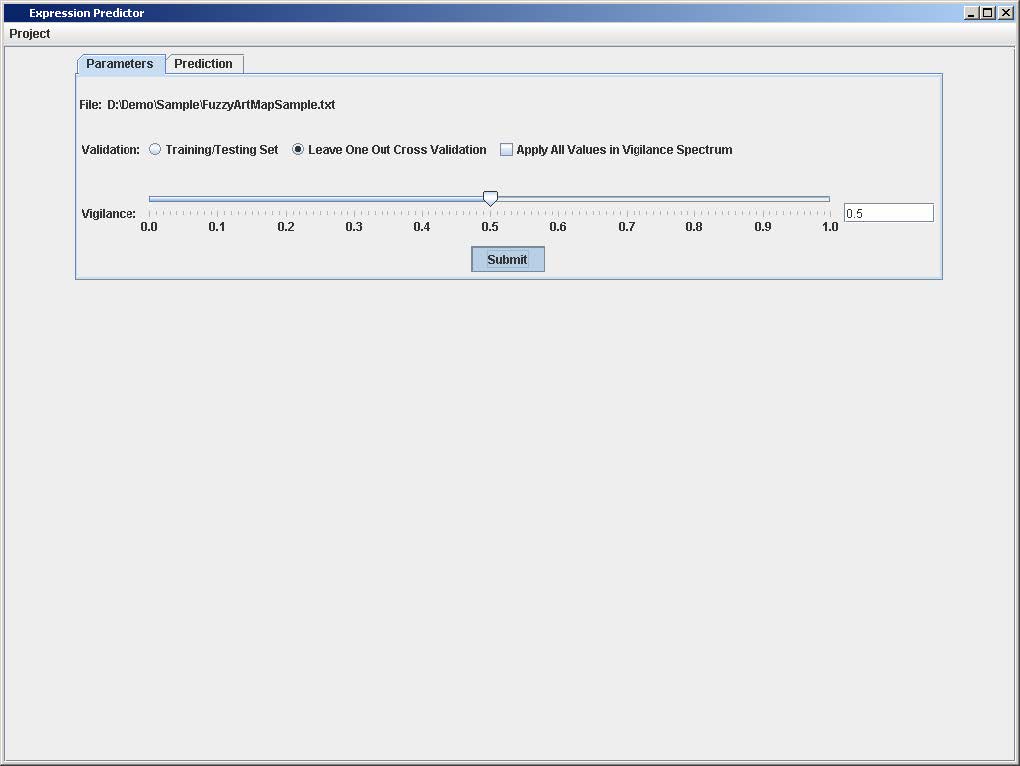
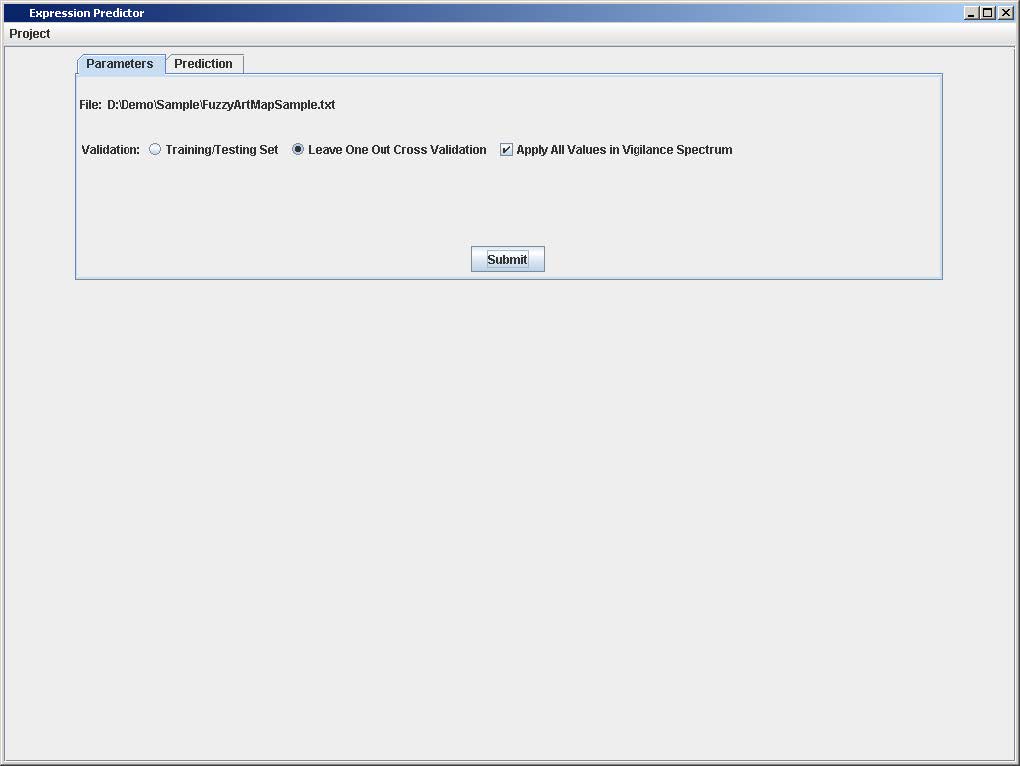
2.1 Leave One Out Cross Validation a Single Run
- Repeat steps 1 to 4 from Section 1.1
Select Leave One Out Cross Validation
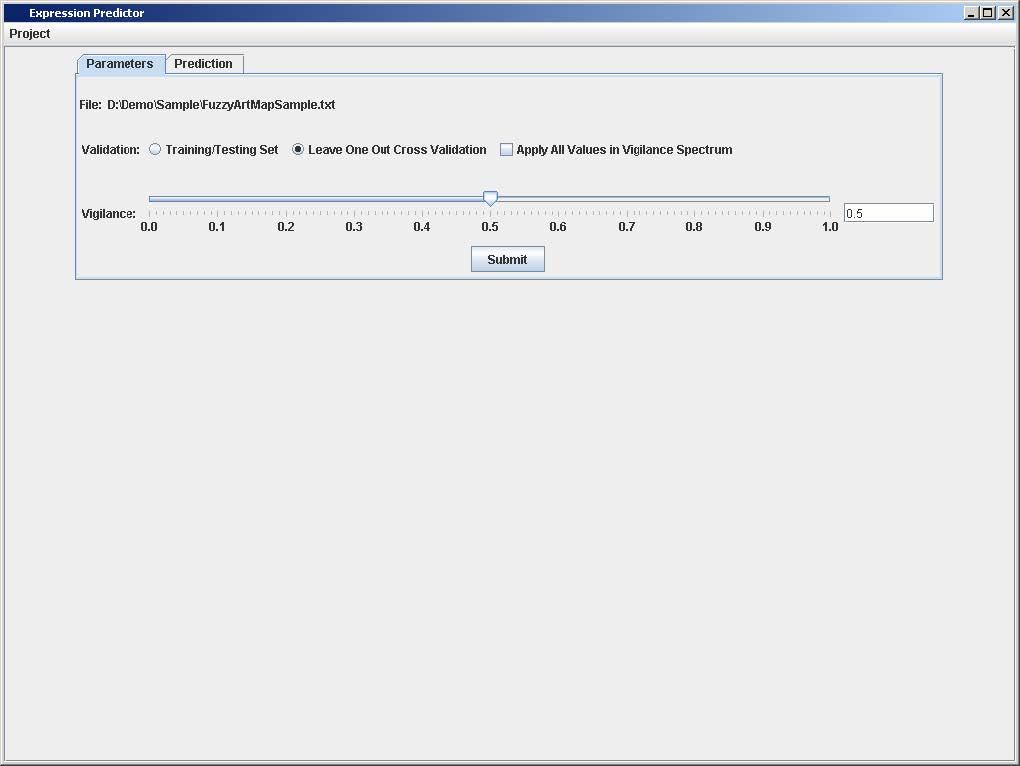
Click on the Submit button
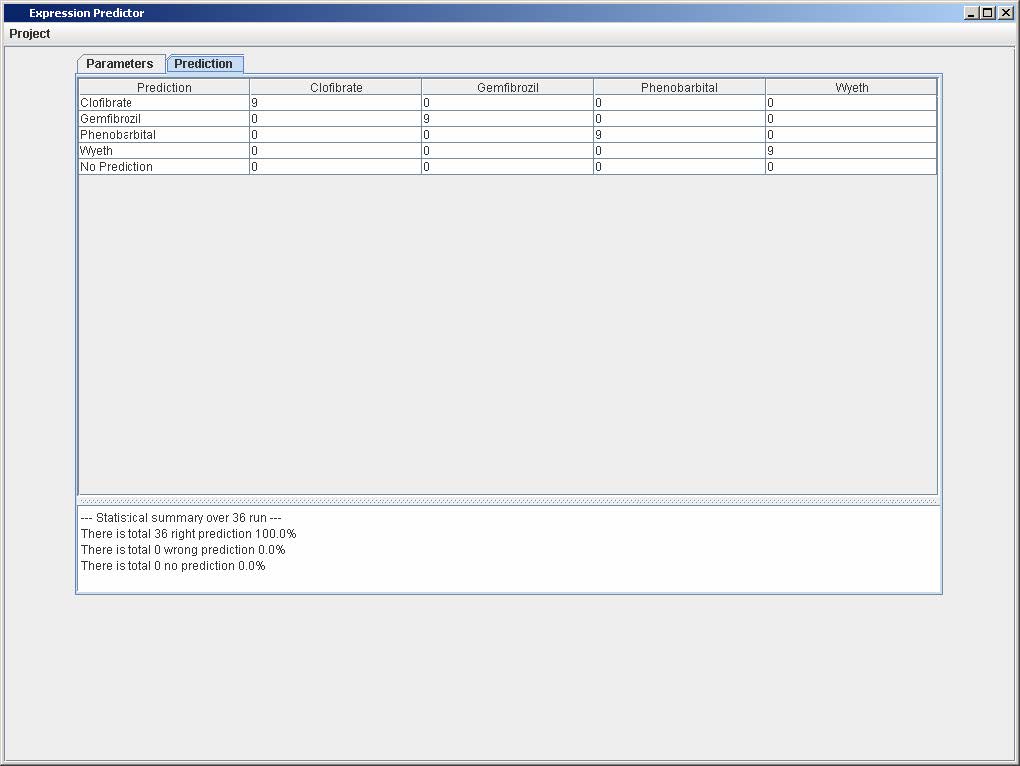
Click on the Prediction Tab to view the confusion matrix
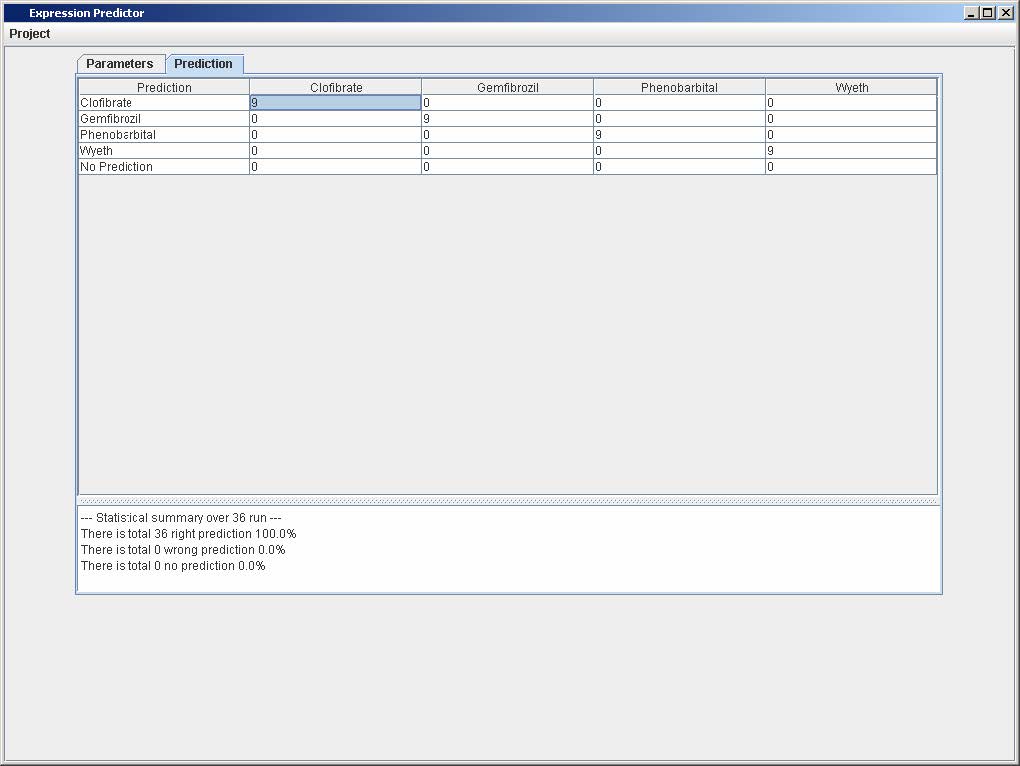
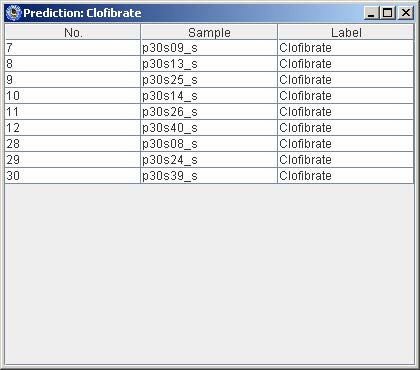
Click on one of the numbers in the confusion matrix to view the list of samples that corresponds to the prediction in the selected cell from the matrix
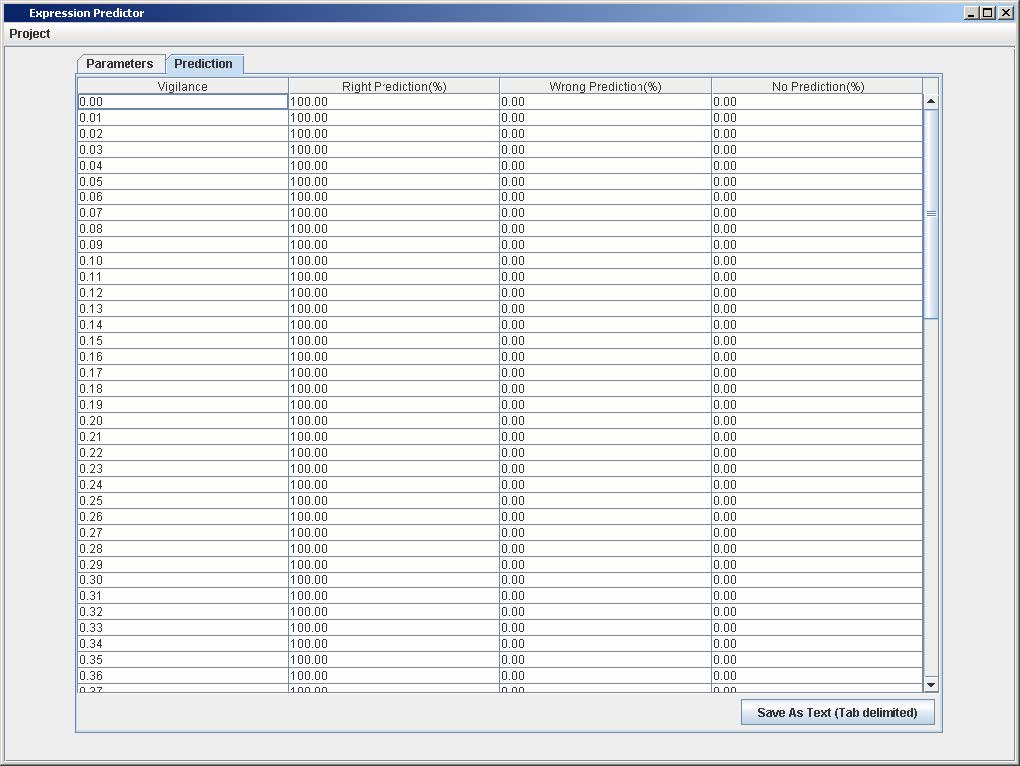
2.2 Leave One Out Cross Validation over the Entire Vigilance Spectrum
- Repeat steps 1 and 2 from Section 2.1
Click on the checkbox that says “Apply All Values in Vigilance Spectrum”
- Repeat steps 3 Section 2.1
Click on Prediction Tab to view the prediction results using vigilance values from 0 to 1 with 0.01 increment at each cycle
- Repeat step 5 from Section 1.2 to save prediction as tab-delimited text file.